Ok so a lot of folk are asking what they should buy as their first bit of photo editing software. To be honest, unless you are going to be spending mega bucks then I suppose it doesn't really matters. Personally, I use Light Room for my RAW editing which is the most amazing program on the planet for this, but for finishing touches, I just use Photoshop Elements which is one of the cheapest programs on the market.
In fact, if I didn't have light room then PSE would do me just fine for the basics and a couple of years ago this is all I was using.
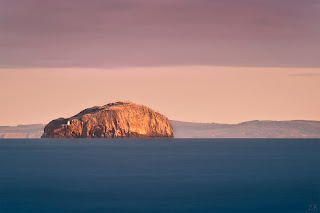
Anyway, here are two shots taken this morning and I've only made a few basic adjustments to them, but I wanted to show you what a difference a bit of post processing can make.
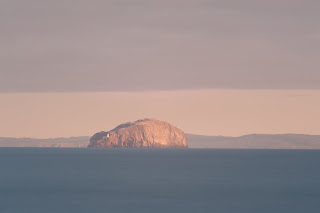
This is the original shot from the Bass Rock this morning, taken from Dunbar. It's ok but there are a few things I don't like about it. First, it's a bit flat which is due to low contrast. In other words, the dark bits are a bit too light and the light bits are a bit too dark. This is easily fixed by raising the contrast level slightly.
Also it's not exactly straight and also something that annoyed me is that the cloud bank to the right is sloping up the way and I wanted that to be a straight line which would make the "layers" of the sea, land and sky look a bit more pleasing. Rotating and skewing the shot fixed this.
I also think that the colour is a bit bland so a boost in either saturation or vibrancy makes the shot a bit richer.
Finally, I didn't like the composition. The Rock wasn't in quite the right place to make the shot jump out of the screen so I cropped it slightly to improve this.
I'll not bore you with further details, suffice it to say that playing around with even the most basic settings in any post processing program can make all the difference in the final result...
Every day since I started taking pictures I've tried to learn something new. Here's some of what I've learnt and although it's more of a reminder for me I hope you find it useful too.
Sunday, March 18, 2012
More Long Exposure Chat
I get quite a lot of questions about long exposure shots. These are the shots where the sea goes all smooth or the clouds flatten out and end up looking like a water colour painting. Essentially, the longer the shutter is open moving subjects like water and clouds will be "smeared" across the photo.
However, the problem with this is the longer the shutter is open the more light gets in and if too much light gets in then the picture will become over exposed and possibly completely white.
I've talked about filters before but some of these are expensive yet you don't always need these to achieve a similar effect. You can just take your shots at night or before the sun has fully come up and that immediately means that the camera will keep the shutter open to allow enough light in which may buy you a couple of seconds.
Please bear in mind that you MUST have a tripod to do these kind of shots
Next reduce the aperture to a very small hole eg f18 or above. This again lets in even less light and increases the exposure time thus allowing even more time for moving subjects to smooth out.
Finally you can drop your ISO as low as it will go eg 100. This reduces the sensitivity of the sensor and therefore increases the shutter time. It's really worth learning about your ISO as it can help you out in many situations --> high ISO e.g 1600 = more sensitive sensor and therefore faster shutter speed (good for low light conditions e.g. night time or indoor shots), low ISO e.g. 200 = less sensitive therefore slower shutter speeds but good for bright conditions e.g.. sunlight.
So here are three shots using the above principles and no filters.
This shot was take at ISO 100 with an aperture of f8 and resulted in an exposure time of 0.6 sec. You can see that there isn't much movement in the cloud and it really just looks like a "snap shot".
This shot was take at ISO 100 with an aperture of f22 and resulted in an exposure time of 5 sec. Now you can see that the clouds and the smoke from the chimney has begun to smooth out due to the longer exposure time of 5 seconds.
This shot was take at ISO 100 with an aperture of f45 and resulted in an exposure time of 15 sec. The very narrow aperture allows hardly any light in so the time has to be increased in order to let enough light in and so the camera increases the exposure time appropriately - 15 seconds in this case. As you can see the clouds and the smoke have had a much longer time to smear across the shot and so it gives that smoothed out effect that everyone keeps asking about.
It's actually quite a simple technique but the results can be quite startling. You can try this yourself using these techniques and hopefully you'll get something similar. Also try it with running/moving water as you really can get some beautiful effects with rivers and the like.
Good luck.
Z
Subscribe to:
Posts (Atom)