This post is just a quick follow on from the previous "Leading Lines" post. In all honesty I just really wanted to post this shot as I totally love it. In fact, it's already in a frame on the wall in the kitchen.
This is the Palacio Da Pena in the hills of Sintra in Portugal. It's an incredible place to visit and I totally recommend it. I could have spend weeks in this one spot taking pictures of the palace's crazy architecture. Also it's a real HDR-users paradise: interesting skies, wonderful foreground and complex structures. It's just awesome.
Anyway, the point of this post was to show how the wall leads the eye into the main part of the picture which is the palace itself. Another example of leading lines. What I have noticed though is that the lines seem to work better if they start in one of the lower corners of the picture instead of the middle.
Project: try taking a picture of some tram lines or rail way tracks and see if the end result is better with the lines in the middle of the picture or off to the side.
Every day since I started taking pictures I've tried to learn something new. Here's some of what I've learnt and although it's more of a reminder for me I hope you find it useful too.
Saturday, July 10, 2010
Flash antics
I'm told that the most important things in photography (apart from talent and skill) are...
Seriously though, flash guns are really worth looking into. They take a bit of getting used too and I'm still pretty poor at using mine. Have a look at the link to "The Strobist" on the side bar and see just how versatile and useful they can be.
What I suggest is the following --> Set up a wee studio like this...
One tripod is for the flash and the other is for the camera. On top of the table is some black paper and I've set up a little still life that contains some random coins and notes (which, alas, are now defunct thanks to the Euro!)
Have a bit of a think how you would like the ambient light to hit the scene. I've got this placed in such a way that the light from the window isn't really a factor in the picture. The reason for this is that I want the flash as the main source of light and I want control over that. If it was a ridiculously bright day outside I'd have it miles from the window, perhaps in another darker room for this experiment. Sadly, it's grey and raining outside.
So the next thing to do is start playing about with all the settings on both the camera and the flash and see what effects you can achieve. I also have a few attachments that I've built for the front of the flash like a diffuser (made from cardboard and a folded up opaque sandwich bag) and a grid-spot (made from cardboard and straws). There's plenty of websites that can show you how to make these for pennies.
Just a quick dig at the Canon users out there... Most of the Nikon DSLRs work as commander units for flash guns and can fire them remotely without the need for a cable - Canon can't unless you have the top end models. Just set the flash unit to "slave" and the camera's inbuilt flash to "commander" and you're laughing (although remember to also set the camera's own flash to the "--" position or you'll have 2 flashes going).
Here are a series of shots using various changes to the flash (although all taken at 1/16th power). The effects are subtle but if you were to translate these to shoot portraits etc then they can become quite dramatic.
This shot has no flash. The ambient light is diffuse and there are no harsh shadows but it lacks focus and makes the image quite poor. Also the wrinkles and folds in the black tissue paper I've used are very obvious and quite distracting especially in the background. You could probably rescue this by reducing the power of the flash but mine only goes down to 1/16th so I'm stuck. A bit of Photoshop work might also have helped here.
This shot has the flash pointing down from the left of camera at about 45 degrees. The flash has pretty much ruined the shot. The shadows are harsh and this is particularly noticeable on the tissue paper crinkles. Also the metallic nature of the coins means that they are reflecting a lot of the light in the form of glare.
Again the flash is pointing down from the left at about 45 degrees with the diffuser on. You can see that the shadows are less hard and also there is now less available light (due to the thickness of my sandwich bag) so the black paper is less "lit up" and now the focus of the picture is moving more to the money.
This shot is the same as the others but I've put the grid-spot on the flash. It makes a huge difference by narrowing the light that comes out of the flash and focusing it on the center of the picture. The black paper is almost completely black now and the eye is drawn to the object of interest instead of the rest of the frame.
Click here to see a great blog post by QH Photography on how the grid-spot works and the amazing affect it can have on your pictures.
So was the guy at the camera shop correct? Probably. However, flashes are really tough to get to grips with. I would suggest that you probably shouldn't be using a flash gun until you understand the "manual" setting of your camera. Having said that you can always put it on the horse shoe and set everything to TTL (through-the-lens). That means that the camera will make most of the lighting decisions for you and won't let the flash over expose the image. Pretty nifty.
Project: buy/borrow a flash gun and try some stuff on a little home made studio like the one in the first picture. Once you've done that, hang a black sheet on a wall and get a willing volunteer to pose for some shots and see if you can get anywhere near the impressive quality of QH Photography or The Strobist.
Good luck!
- The camera
- The lenses
- The lighting
Seriously though, flash guns are really worth looking into. They take a bit of getting used too and I'm still pretty poor at using mine. Have a look at the link to "The Strobist" on the side bar and see just how versatile and useful they can be.
What I suggest is the following --> Set up a wee studio like this...
One tripod is for the flash and the other is for the camera. On top of the table is some black paper and I've set up a little still life that contains some random coins and notes (which, alas, are now defunct thanks to the Euro!)
Have a bit of a think how you would like the ambient light to hit the scene. I've got this placed in such a way that the light from the window isn't really a factor in the picture. The reason for this is that I want the flash as the main source of light and I want control over that. If it was a ridiculously bright day outside I'd have it miles from the window, perhaps in another darker room for this experiment. Sadly, it's grey and raining outside.
So the next thing to do is start playing about with all the settings on both the camera and the flash and see what effects you can achieve. I also have a few attachments that I've built for the front of the flash like a diffuser (made from cardboard and a folded up opaque sandwich bag) and a grid-spot (made from cardboard and straws). There's plenty of websites that can show you how to make these for pennies.
Just a quick dig at the Canon users out there... Most of the Nikon DSLRs work as commander units for flash guns and can fire them remotely without the need for a cable - Canon can't unless you have the top end models. Just set the flash unit to "slave" and the camera's inbuilt flash to "commander" and you're laughing (although remember to also set the camera's own flash to the "--" position or you'll have 2 flashes going).
Here are a series of shots using various changes to the flash (although all taken at 1/16th power). The effects are subtle but if you were to translate these to shoot portraits etc then they can become quite dramatic.
This shot has no flash. The ambient light is diffuse and there are no harsh shadows but it lacks focus and makes the image quite poor. Also the wrinkles and folds in the black tissue paper I've used are very obvious and quite distracting especially in the background. You could probably rescue this by reducing the power of the flash but mine only goes down to 1/16th so I'm stuck. A bit of Photoshop work might also have helped here.
This shot has the flash pointing down from the left of camera at about 45 degrees. The flash has pretty much ruined the shot. The shadows are harsh and this is particularly noticeable on the tissue paper crinkles. Also the metallic nature of the coins means that they are reflecting a lot of the light in the form of glare.
Again the flash is pointing down from the left at about 45 degrees with the diffuser on. You can see that the shadows are less hard and also there is now less available light (due to the thickness of my sandwich bag) so the black paper is less "lit up" and now the focus of the picture is moving more to the money.
This shot is the same as the others but I've put the grid-spot on the flash. It makes a huge difference by narrowing the light that comes out of the flash and focusing it on the center of the picture. The black paper is almost completely black now and the eye is drawn to the object of interest instead of the rest of the frame.
Click here to see a great blog post by QH Photography on how the grid-spot works and the amazing affect it can have on your pictures.
So was the guy at the camera shop correct? Probably. However, flashes are really tough to get to grips with. I would suggest that you probably shouldn't be using a flash gun until you understand the "manual" setting of your camera. Having said that you can always put it on the horse shoe and set everything to TTL (through-the-lens). That means that the camera will make most of the lighting decisions for you and won't let the flash over expose the image. Pretty nifty.
Project: buy/borrow a flash gun and try some stuff on a little home made studio like the one in the first picture. Once you've done that, hang a black sheet on a wall and get a willing volunteer to pose for some shots and see if you can get anywhere near the impressive quality of QH Photography or The Strobist.
Good luck!
Photomerge
So your back's against the wall and the lens you are using won't go any wider but you really want to capture more of the scene in front of you.
What are your options?
1. Buy a wider lens
2. Knock down the wall and take a few more steps back (probably not practical)
OR
3. Take more that one picture and join them together.
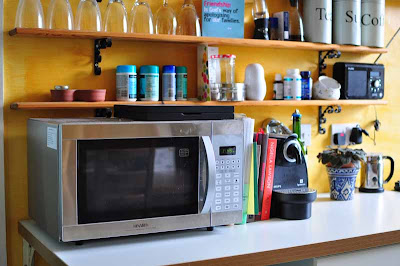
Please excuse the fact that I've used my cluttered kitchen but it's pouring outside today so it'll have to do... but here is a pic taken with the 35mm f1.8 lens.
As I'm sure you realise, this lens has no zoom function and is a "prime" lens so it is fixed at 35mm and can't give you a wider shot (unless I was to take a few more step backwards).
So instead I took 9 shots (3 top, 3 middle and 3 bottom) making sure each one over lapped with the next one. Then I went to Photoshop Elements 8 and did the following...
Here is the result...
Instant wide angle! OK, so it's not instant and takes a wee bit of processing. Also you have to crop the result too as Photoshop will create weird shapes with each pic to try and keep the perspective correct. The whole thing works best if you have at least 20% overlap so bear that in mind when you're lining up your shots.
Anyway, give it a shot but just start with two or three pics before you start trying some crazy 100 image of the Himalayas.
What are your options?
1. Buy a wider lens
2. Knock down the wall and take a few more steps back (probably not practical)
OR
3. Take more that one picture and join them together.
Please excuse the fact that I've used my cluttered kitchen but it's pouring outside today so it'll have to do... but here is a pic taken with the 35mm f1.8 lens.
As I'm sure you realise, this lens has no zoom function and is a "prime" lens so it is fixed at 35mm and can't give you a wider shot (unless I was to take a few more step backwards).
So instead I took 9 shots (3 top, 3 middle and 3 bottom) making sure each one over lapped with the next one. Then I went to Photoshop Elements 8 and did the following...
- Goto "File" --> "New" --> "Photoshop Photomerge"
- Click "Browse" and select your pictures. As I said, I used 9 here but you can use as mew or as many as you like. I saw a 57 image photomerge once!
- Click "OK" and Photoshop should start trying to piece everything together.
Here is the result...
Instant wide angle! OK, so it's not instant and takes a wee bit of processing. Also you have to crop the result too as Photoshop will create weird shapes with each pic to try and keep the perspective correct. The whole thing works best if you have at least 20% overlap so bear that in mind when you're lining up your shots.
Anyway, give it a shot but just start with two or three pics before you start trying some crazy 100 image of the Himalayas.
Thursday, July 8, 2010
Leading Lines
There's always some blurb in photo mags and web sites about this. Often you'll post a picture on flickr.com and someone will post "nice leading lines" but to start with I had no idea what they were on about.
Yes it's obvious that they are talking about a "line" or "lines" in the picture and that they "lead" somewhere, but what's the point of them? Well they really can add something to a picture. They provide depth and 3-dimensionality to a shot and should act to draw the eye into the picture. Often this is from the foreground to the background (or to the main object in the shot) and this makes the picture more interesting.
This picture of the Tomar aqueduct in Portugal shows how the foreground part of the picture catches your eye and then the line or the aqueduct leads into the picture and almost forces you to look deeper into the frame. It's one of those composition things that the people in the know go on about but to be honest I've noticed that loads of folk use this in their shots without even realizing. I guess that's testament to how much they can improve a photography.
Project: Try it with roads, fences, railings, logs, railway tracks, etc.
Enjoy.
Monday, July 5, 2010
Spray
This is just a quicky!
Sometimes you take a picture and the lights or the sun in the picture form a star like shape. How does that happen? Well my understanding of it is that if you use a very narrow aperture (f22 or higher) then the light "sprays" through the small gap caused by the blades of the lens. It's almost like the opposite of what you are trying to get with bokeh and a wide aperture (which gives you blurry round lights in the background of photos).
Anyway, this shot was taken at 15mm f20 1/125th sec. The high f-number causes a narrow aperture and the light from the sun sprays out like a star. It's quite a nice effect but bear in mind the following...
1. Narrow aperture requires bright light or a tripod (for slower shutter speeds)
2. Depth of field lost with high f-numbers
3. Looking through the view finder at the sun is just stupid. Use Live View instead.
You can see here I've used some of the dappling from the trees to reduce the light coming from the sun or else I would have ended up with completely silhouetted trees and hand.
Go and have a shot just now. Try it on some spot lights first at f 5.6 and then f20 and see the difference.
Subscribe to:
Posts (Atom)